Sunday 21 November 2010

Stirring It Up

Today we made Yule Puddings. I used a plum pudding recipe from Mrs Beetons Christmas Book and Abi helped.

Rich Boiled Christmas Pudding

200g plain flour
pinch of salt
1 x tsp ground ginger
1 x tsp mixed spice
1 x tsp grated nutmeg
50g chopped blanched almonds
400g soft light or dark brown sugar
250g shredded suet
250g sultanas
250g currants
250g raisins
200g mixed peel
175g 1 day old breadcrumbs
6 eggs
juice of 1 orange
80ml stout
4 x tbsp brandy
100-150ml milk
fat for greasing


Grease 4 x 600ml heatproof basins.

Sift together flour, salt and spices and add all other dry ingredients.

Beat together eggs with the stout, orange juice, brandy and 100ml of the milk.

Stir this into the dry ingredients until you get a soft dropping consistency, add more milk if required.

Fill the basins leaving 1 inch at the top for the puddings to expand. Cover with greased paper and tie securely with string.

To 'half-steam' get a large saucepan, place an old saucer or plate upside down and oplace the basin on top. Add water till halfway up the side of the basin. Cover the pan with a tight fitting lid and simmer gently for 6-7 hours.

Remove puddings and leave to cool completely. Cover with clean dry cloths, wrap in greaseproof paper and store in a cool place.


Friday 12 November 2010

Basic Chutney Recipe with variations

This is my base recipe that I tweak depending on what ingredients are in season.

2 tbsp olive oil
1lb roughly chopped onions
2 large red peppers, cored, seeded & roughly chopped
1 garlic clove, crushed
1 tsp ground allspice,
1 tsp ground ginger,
1 tsp paprika
1 tsp salt
2 lb ripe tomatoes, peeled & roughly chopped
1 lb sugar
300 ml vinegar (malt, white or red wine, or plain white – depending on taste, dietary restrictions)


Add all ingredients to heavy bottomed pan, cook on a medium heat at a lively simmer, stirring regularly, until the chutney is ready. You’ll know when it’s ready to go as you can drag a spoon through the mixture creating a channel that takes a while to fill back up.

Ladle into sterile warm jars. Cover and leave to cool. Label and store in a dark place for 6-8 weeks before use. The longer it has to mature, the nicer the chutney.

Once open keep refrigerated and use within a couple of weeks.


  • For chilli chutney I add a handful of chopped and deseeded chillies.
  • For very hot chilli chutney, I keep the seeds in ;)
  • For plum chutney, substitute stoned and peeled plums for the tomatoes.
  • For onion chutney, double the onions and halve the tomatoes.
  • For onion relish, triple the onions, leave out the tomatoes and use a blender to get a smoother consistency.
  • For apple chutney, replace the tomatoes with 3lbs of apples and add a handful of raisins.

Wednesday 10 November 2010

Freecycle Hacking

I am incredibly lucky to be part of a generous recycling community where I live. I'm a member of Freegle, Realcycle and Freecycle and anything we no longer have a use for is offered on the sites. I also put requests out for items such as baby food jars for my preserves, empty beer bottles for our mead etc.

Our house is filled with items from freecycle, our sofas, storage, dining table and chairs, filing cabinets, slide, swing set, garden swing seat, wardrobes, children's toys...the list goes on. If I see an advert for an item I like, I send a polite reply stating my contact information and when I would be able to collect. I also include a link to this blog in my email signature so people can see the items will be put to good use.

Although the majority of freecyclers are friendly individuals, there are also plenty out there who are rude, ignorant and pretty greedy. I have had some strange requests, and every advert posted brings it's own weird and wonderful characters.

One of the reasons we are so lucky on freecycle is that we're willing to take items that need a bit of fixing up, the play kitchen for Abi's christmas present last year for example.

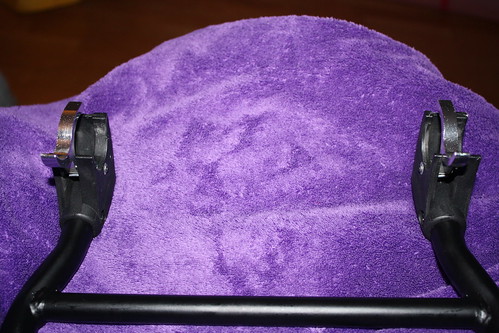
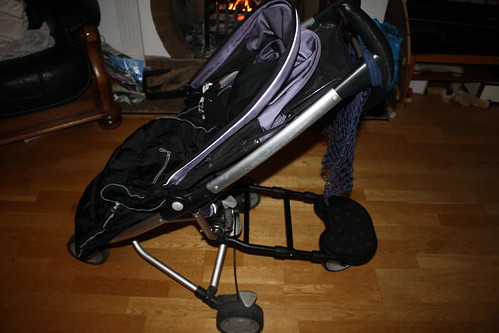
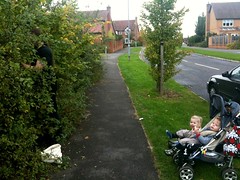
This week, I managed to be gifted a Quinny Zap pushchair. It's perfect for me as it's small for the buses and playgroup corridors, lightweight, sturdy and it's purple ;). The only problem with it is one of the side catches doesn't quite lock but the pushchair is functional and safe.

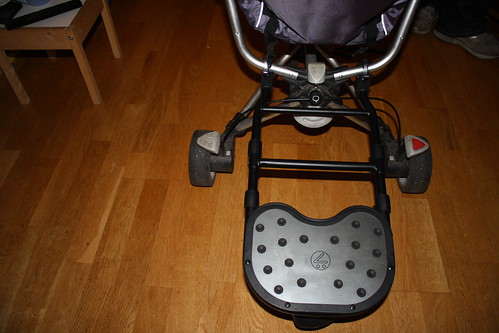
The other issue is that although Abi walks pretty much everywhere, she gets tired on long walks and we use a buggy board so she can rest awhile. The old generic buggy board we used was rickety and liable to fall off when going over kerbs and our nice buggy board was a brand specific one for our Mutsy offroader buggy.

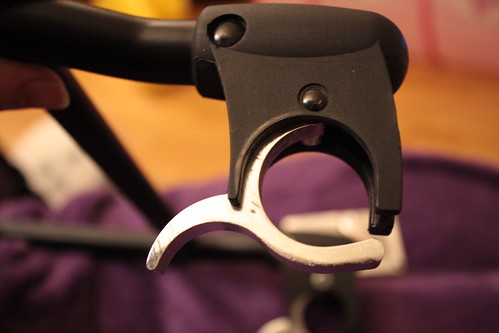
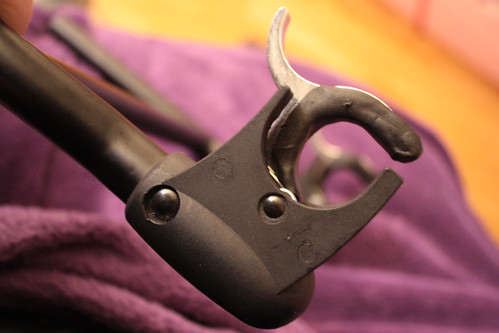
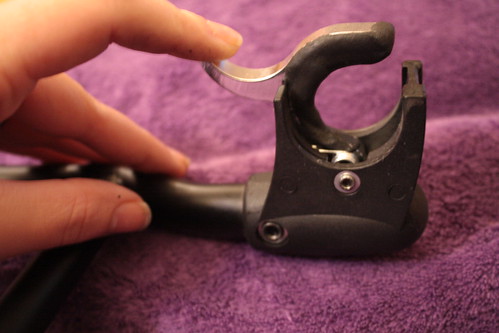
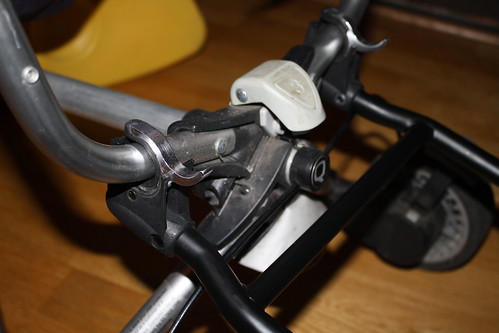
After a good luck at the underneath of the buggy, we thought that the Mutsy board might just be usable so we thought we'd try and give it a go. After trying it on for size, we realised that the only way to get it connected safely would be to turn one of the connectors upside down in order to keep the board level. So we flipped it over and drilled a hole in one side to enable the poles to lock into position upside down. This worked near perfectly but the board attachment clips were a little loose on the buggy. We needed something to help them grip slightly but still enable me to take them on and off quickly as I suffer with carpal tunnel and have problems with my grip.

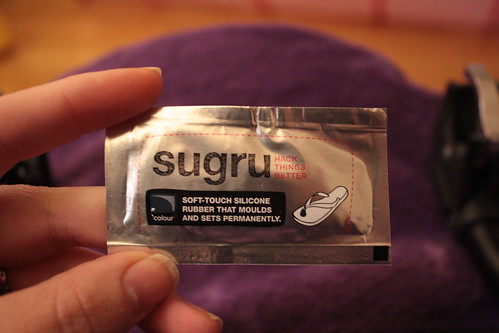
We decided to try some 
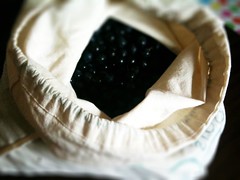
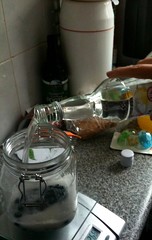
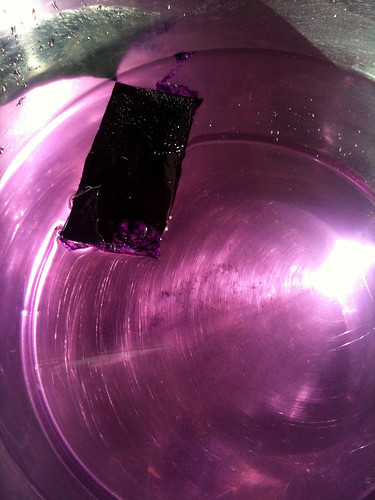
sugru on them and it worked brilliantly. Sugru is silicone, but it's like playing with plasticine. You can mold it onto whatever shape you want, stick it to something, leave it to cure and voila. There are lots of great sugru hacks on their blog over at http://sugru.com/blog/ (Hack is the term the sugru makers use for their product, so anybody who wants to argue about the use of the word in my title should shush now ;) )

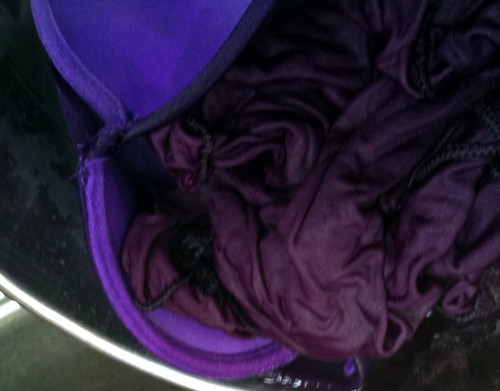
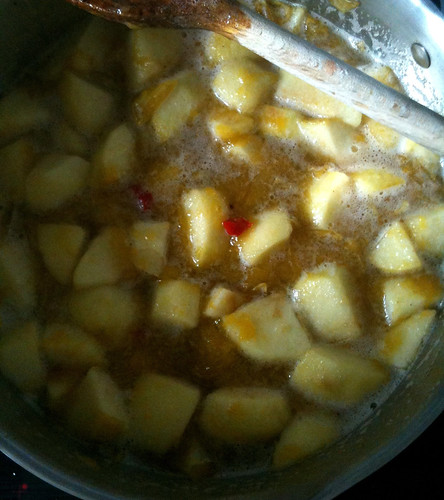
Here are some photos of the Buggy Sugru Hack

Buggy Board Hack

Buggy Board Hack

Buggy Board Hack

Buggy Board Hack

Squishy

Buggy Board Hack


Buggy Board Hack

Buggy Board Hack

The sugru has a little bit of give to it which adds to the grip as it connects to the buggy.

Buggy Board Hack

Buggy Board Hack

Tada. A buggy that is perfect for our family and one less item going to the tip.

Buggy Board Hack

Tuesday 19 October 2010

Sloe Gin

We finally found some sloes yesterday and have been busy today turning them into booze.

Picking sloes with an audience


3.5kg picked from one small area.


Washed, destalked and frozen overnight to split the skins. (I don't have the time to prick each one so I cheat)

Place 500g in the bottom of a clean 2 litre bottle. Add 200g sugar, white is normally used but we're trying soft brown in one) and approx 500ml of gin (some of ours have a little more in. We're also trying a 1/2 tsp of almond essence in some of the bottles.


Same as the blueberry vodka, shake every day for a week, every other day for a fortnight then once a week till December. Then strain off, bottle up and drink :)

Blueberry Vodka

Quick recipe for blueberry infused vodka.

Send minion to collect blueberries


Wash and place in a kilner (or any other airtight) jar.


Cover with sugar


Add cheap vodka


Close the lid and give it a really good shake up.


This makes me want a snowglobe :) I must try and get one for Abi this year.


Tada


Not quite...I'm making this at the same time as sloe gin so will treat this the same. Shake it every day for a week, every other day for a fortnight, then once a week till beginning of December. Then I'll have a taste and see if it's ready to drain off.

The leftover blueberry mush will be used as the base for a dessert syrup.

- Mobile post

Monday 18 October 2010

Foraging

After a lot of walking and wandering and googling to try and find some sloes to make into gin, it became apparent that there really is no substitute for local knowledge.

Whilst picking away at the sloe trees that a friend had told us the location of, I was thinking over ideas to help other would be foragers.

I've started playing with the idea of a google map based system, where we can log areas that have forageable food, along with tips of how to access them.

It's only in the beginning stages of an idea, but this is the bit of harvesting we did this morning.


View Foraging in a larger map

What do we think? Any ideas

Friday 27 August 2010

Purpley Prettiness

After an unsuccessful attempt at dying polyester in my washing machine, I was on the lookout for a decent sized dye bath.

I put out a request for old large pans or stock pots on freecycle and crossed my fingers. Three timewasters later (I have no idea what drives people to offer items then ignore all contact) I received an offer from a lovely lady 10 minutes away. She said she had a very large pan that I was welcome to. Steve went off to go collect it and whilst she was sorting it out for me she found another couple of pans she thought I could use.

How fab are these?? I've got a batch cooking session planned tomorrow for the largest pan :)


So, take one crimson pink hooded cloak.


and some bras that never get worn due to their colour.


Some lovely violet iDye


Weigh your fabric to make sure it's not over 3lbs.


Open pack of dye and check the contents.


Add enough water to the pan to allow the fabric to move freely.


Take out your now wet fabric, put the heat on medium-high and chuck your colour packet in.


Stir until it's dissolved thoroughly.


Add the second packet of intensifier.


Due to the fabric mix of the bras, I chucked in a cup of salt.


Add fabric and stir thoroughly.


Heat fabric up till the water is at a steady simmer and maintain that heat for an hour whilst stirring regularly.


Drain water off and leave the fabric to cool.


Pop in the washing machine and run through a wash with some mild detergent.

Ta Da


I really love this dye, very simple to use with very little mess!

a quickr pickr post

Monday 9 August 2010

Mini Bint's Kitchen

Just a quick post to show the restored play kitchen we created for Abi's 3rd birthday.

We picked up the original kitchen from freecycle. It was advertised as an old handmade wooden kitchen created by a grandfather for his now grown grandson. We spent just over £10 on paints and materials and it took about 4 evenings to get the work completed, mostly to allow for drying times and re-applications of coats.

Here's the flickr slideshow and photostream showing the work we did, and what Abi thought of the end result :)


Saturday 31 July 2010

Sweet and Sour Chutney

This morning there was an advert from a lady on freecycle trying to get rid of her excess cherry plums. I couldn't resist and Steve nipped down there and came back with 4kg of green and 2kg of red plums :)

I dusted off my stockpot and decided to use up some cooking apples at the same time.

Apple and Green Plum Chutney

2kg Green Plums. Rinsed well with cold water.
200ml cider vinegar
4 medium cooking apples, peeled, cored and chopped
3 small red chillies, chopped finely.
300g sugar.

Place (whole, with stones) into stock pot, add vinegar and let simmer for 20 minutes.


Using a slotted spoon, go through the mixture and remove the stones with a teaspoon. This does take 5-10 minutes, but it's infinitley easier than trying to destone fresh tiny little plums.


Lots and lots and lots of lovely stones.


Give the vinegary plum mixture a good stir.


Add the chopped apples, chillies and the sugar. Stir well and turn the heat to medium.


Cook at a quick boil, stirring regularly for at least an hour until the mixture is thick and gloopy. You should be able to pull a spoon through the mixture and leave a trail that takes a few moments to fill.


Jar up into sterile vinegar proof jars, label, cool and store in a dark place for 6-8 weeks to mature.


Nom with cheese.