Friday, 11 December 2009

Grand Designs - From Barbie to Binthouse

Although we're both atheist, we enjoy the family aspect of this time of year and look forward to the Winter Solstice. We put up a small tree with some twinkly lights, we're collecting baubles over the years - little ornaments that mean a lot, and we eat an awful lot of food. (More on the food in the cooking blog soon ;) )

However, my husband and I don't like spending money on 'stuff'. We're a single income household who like to live as well as possible, so there generally isn't a lot spare or extra. Most of our xmas presents for others this year have been covered by making hampers of our home-made produce. Our children aren't that huge a fan of my chilli chutney yet though ;)

So this year, we've done the ubiquitous 3 for 2 from Boots using up points obtained from baby items over the last year, recycled some of Abigails toys from the last year for Toby, and scoured Ebay for something special for Abi.

This was the result of my bargain hunting.

PhotobucketPhotobucket

Lovingly painted by it's previous owner in barbie pink emulsion.

It comes with lots of furniture and some dolls :)

PhotobucketPhotobucketPhotobucket

PhotobucketPhotobucketPhotobucket

PhotobucketPhotobucketPhotobucket

Photobucket

PhotobucketPhotobucket

PhotobucketPhotobucket

PhotobucketPhotobucket

PhotobucketPhotobucket


Photobucket Photobucket

Photobucket Photobucket

Photobucket Photobucket

Photobucket Photobucket

Photobucket

PhotobucketPhotobucket

Photobucket

Photobucket Photobucket

Photobucket Photobucket


.......

More to come

Monday, 7 December 2009

Salsa Recipe- Spicy and Not so Spicy :)

Salsa Recipe -

Makes 5 Litres - (I like to cook in bulk ;) )


6 large red onions roughly chopped
6 bell peppers - variable colours good, roughly chopped
A lot of tomatoes - I used about 1.5kg, ish - diced roughly.
5 peri peri chillies
A handful of coriander chopped roughly
A large splash of lime juice
Wine vinegar - I used a mixture to finish some bottles off, was probably about 100ml red, 150ml white.


Fry onion gently till soft in some olive oil, chuck in the peppers and give them a few mins, chuck in the tomatoes and cook down for 10 mins.

Add coriander, lime and vinegar. Give it a good stir, pop the lid on and leave for a while. Mine cooked down for about 4 hours. I think anything with tomatoes in, does well with an elongated cooking time to break the texture down a bit.


Take out about a third of the mixture and puree it using a blender or processer, mix most of it (keep a 100ml or so out) back in with the original mixture to thicken it all up.

At this point, I took a third out from the salsa to keep as non spicy stuff.

Top and tail the peri peris, and pop them in the 100ml of puree - whack them back in the processer or blender and reblend it.

Add this to the remaining salsa, stir well and tub up.

The spicy stuff will mature while it's stored as the peri peri's do their thing.

Any chillies should work just as well, next time I might pop some sliced jalapenos in as well.


Nom with tortillas, cheese and lots of sour cream


Monday, 16 November 2009

Dark Orange Mead Recipe

After reading through a lot of recipes for basic mead, I found these two intriguing


So I had a look through the cupboards and made up my own recipe using these as a guide.


Dark Orange Mead - 2 gallons


  • 7 x 340g jars of honey.- I used 6 x Tesco's own, and 1 x eucalyptus honey.
  • 2 large oranges
  • The zest of one lemon
  • 2 cinnamon sticks
  • 10 cardamom pods
  • 10 cloves
  • 2 heaped tsp of yeast - I used champagne yeast for it's higher alcohol, can use any type
  • 10 black peppercorns
  • 1kg brown sugar
  • 2 x fermentation buckets or demijohns. They need to be airtight.

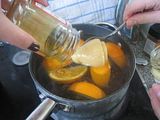
Using a large gallon stock pot if possible, (I don't currently have a pan this large, hence the use of two pans at some points during this process) empty the jars of honey

Photobucket

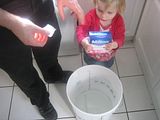
Add a little boiling water to make it liquid and then add the sugar

Photobucket

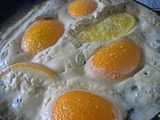
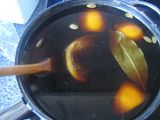
Slice the oranges into quarters and put into the pan with the other spices

PhotobucketPhotobucket


Top up with water and then bring to a low boil, simmer for 30 minutes and then leave to cool to room temperature.

Photobucket

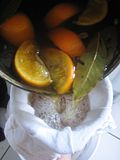
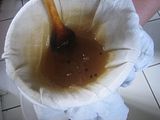
Empty liquid into fermentation bucket through a sieve

Photobucket

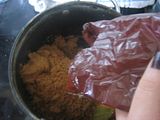
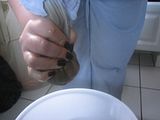
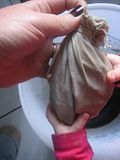
Empty the spice and orange bits that have been collected in the sieve and place into a muslin, tie the muslin into a parcel with string and keep to one side.

Photobucket

Top up the liquid in the fermentation bucket with room temperature water (any colder and the yeast will take a bit longer to get started) up to 2 gallons and add 2 heaped tsp of yeast. (it's 1tsp per gallon so can be adjusted if making more or less mead)

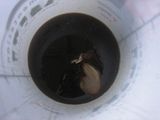
Give it a good stir, then place the parcel of spicy orange bits back in the liquid and close the air tight lid.

Photobucket

Place somewhere warm and out of direct light or drafts. Ours lives under the sewing table in the front room (although from the amount of root beer, ginger beer, mead and brewing paraphernalia on the table it may be due a name change at some point ;) )

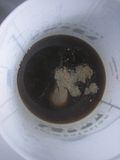
After 48 hours, lift the lid and check that the yeast is active. There should be frothing and some fizzing. Don't worry about the smell and cloudiness at this point, it does tend to smell a bit funky.

If there has been no frothing, fizzing, or the lid of the bucket hasn't 'domed' then it may be worth adding 1 more tsp of yeast and giving the whole mixture a good shake. Leave it for another 48 hours and then check again. If it's still not active, then your bucket may be in too cold a spot and will need relocating. Yeast needs to be at room temperature to be at its most active.

Once the yeast has been active, remove the muslin parcel and dispose of it then close the lid and leave for 4 weeks. Completely leave it, no poking, prodding, testing, touching, sniffing....nothing.


After 4 weeks, rack the mead into a different bucket. To 'rack' means to syphon the clear liquid away from the sediment at the bottom. With our first batch, we didn't have a second bucket so racked it into 2 litre pop bottles instead, this worked fine and was useful for checking the sediment at the bottom.

After 2 weeks, gently pour off a little taster snifter and be proud of yourself ;)

(We've actually started drinking our first batch mead at this stage, because it is so very nice)

After another 2 weeks, rack off into another bucket again in order to leave the last of the sediment, leave to settle and then bottle up.

The flavour of the mead develops nicely if the bottle is thoroughly chilled before drinking.

Enjoy :)

Thursday, 12 November 2009

Popcorn in Toffee Sauce

Recipe yoinked from here - http://www.bbc.co.uk/dna/h2g2/A972362

This is incredibly easy to make. The exact quantities are not important. It will turn out as sweet sticky goo whatever you do.

Method

  • Put a chunk (about 50g) of butter in a pan.

  • Add about 4 heaped tablespoons of soft brown sugar (demerera or turbinado is best). Do not use white sugar or it will be spoilt.

  • Add 2-3 tablespoons of golden syrup. To stop the syrup from sticking to the spoon, heat the spoon over a flame for a couple of seconds first. It works wonders. An alternative method of spoon-heating is to pour the water of a freshly boiled kettle onto the spoon, while keeping your hands protected by the likes of an oven mit. If you haven't any golden syrup then don't despair. As a last resort there is treacle, but it doesn't really work. In the unlikely event that you haven't got any treacle or golden syrup, then you could experiment with maple syrup. This is less viscous so less sugar should be used with maple syrup.

  • Stir together at a medium heat until the butter is completely melted, and all the sugar has dissolved.

Now you have made the popcorn and the toffee sauce, you need to put them together. This must be done while the sauce is still hot and liquid.

  • Put the popcorn into a large mixing bowl.

  • Drizzle the toffee sauce over the top.

  • Stir.

  • Keep stirring.

  • Stir some more.

  • Stop stirring if the sauce has now cooled to a degree where it is no longer runny and is setting, if not go back to stage three.

  • Leave until is cool enough to eat. (This fortunately is only a few minutes).

Stirring is very important. If the stirring is not done for long enough then the toffee sauce tends to form a sticky layer at the base of the bowl. In some ways, this can be a good thing, providing you with a lovely gooey dip for your popcorn. By changing the quantities of syrup and sugar, the sauce can be made more sticky or more runny. You should perform experiments to find your preferred viscosity.

Unless something went horribly wrong, you should by this stage be the proud owner of homemade toffee popcorn. It is best to eat quickly, or you will find that someone has eaten it for you.


Om Nom Nom


Sunday, 4 October 2009

Bint's Brewery

Well, all the hops and ginger ale seem to have sparked a bit of an obsession with me ;)

We've now got another batch of ginger beer brewing in bottles, plus the ginger beer plant is alive and thriving ready for another batch next weekend. This one is going to have a bit more of a fiery kick ;)

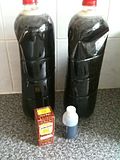
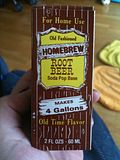
I've also sourced some Root Beer extract from the US, and had a go at making some of this.


PhotobucketPhotobucket


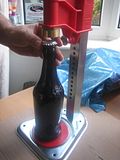
Also used this as an excuse to try out the bench capper that was delivered this week.


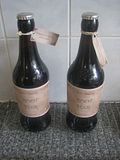
Photobucket Photobucket

We've got about 25 real ale bottles that we've emptied ourselves, we currently go through a couple of bottles a week but not enough to cover all of the ongoing brewing. I posted a request on my local freecycle group and now have a couple of people saving them for me and we'll collect them over the next fortnight. :) Gotta love freecycle.

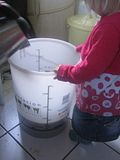
Today has seen the creation of a new drink, Dark Mead. We wanted to make some mead, for our own use and for christmas presents but couldn't find a simple enough recipe that didn't involve us spending a huge amount of money on demijohns and valves and things and stuff.

After reading through some 'basic' recipes I concocted a 'bint' version and off we toddled to make up a gallon of nectar. Midway through making this we decided that a gallon just wasn't enough...so we decided to extend the recipe...but we had no more honey and no intention of buying any more, as it's not the cheapest ingredient.

After a bit of thought, we decided to add a dark sugar syrup that had been steeped in the same spices that were used to flavour the honey water. The results are a very strong dark honey tasting fragrant liquid that will hopefully stay sweet and become quite alcoholic ;)


PhotobucketPhotobucketPhotobucket

PhotobucketPhotobucketPhotobucket


PhotobucketPhotobucketPhotobucket


PhotobucketPhotobucketPhotobucket


PhotobucketPhotobucketPhotobucket